

The action in Kena Bridge of Spirits turns up to 11 for the various bosses that grace the game, so here’s a rundown of the ones we know about so far and we’ll be adding in the rest as they’re revealed. The 3rd person action adventure sees you taking to the path to the sacred mountain shrine with the lead character Kena, and she’s got a lot of skills in her kit bag to fight off the dark spirits that embody the big beast enemies in the game.
To beat all of the bosses and save the spirits trapped in the dark clutches of them, she’ll need to use her staff wisely, whether in standard combos or transitioning into the bow function. It’s not the only weapon she has in her arsenal, though, as she can also use the power of the Rot to deliver heavier blows to the enemies that she must overcome.
AdvertisementWhen you get to play the game, you might need a few pointers in terms of how to take on some of the bosses, so we’ll add in detailed guides for each of them to point you in the right direction. However, to help you get better prepared for Kena Bridge of Spirits, you can also see a number of the boss fights in the gameplay video at the bottom of the page.
Bosses
The game has only recently come out, so the bosses listed out below will grow as we make our way through to the end of the game. We’ll list them out in order of appearance to give it a bit more structure and make the guide easier to follow.
AdvertisementThe very first boss is called Sprout and it occurs during the very first phases of the game, but it’s so easy to beat with light combos that it isn’t really worth going into more detail.
Kappa
Kena must fight this wood spirit when she gets to the heart of the Kappa cave. It’s sends out a fair few littler Sprout enemies to make things difficult for you and it ducks down underground when you approach it and reappears further away. It also throws little fire balls at you from afar, so it can be a tough one to attack.
However, as you can see in the gameplay video below, you can use a Rot attack to bind it and force it to stand still when you get near to it, which will allow Kena time to get in close to do some more damage with her spear attacks. Just don’t stay close for too long, because it will hit you with an uppercut swipe with it’s branch claw hands.
AdvertisementIt can also appear on a ledge above the Kappa cave chamber and fire a sweeping ember blast at you, so make sure you run to avoid being hit in the shower of sparks. Cycle, rinse, repeat the process above and you should be able to beat the boss without too many dramas.
You can see how to string all of this together in the video below.
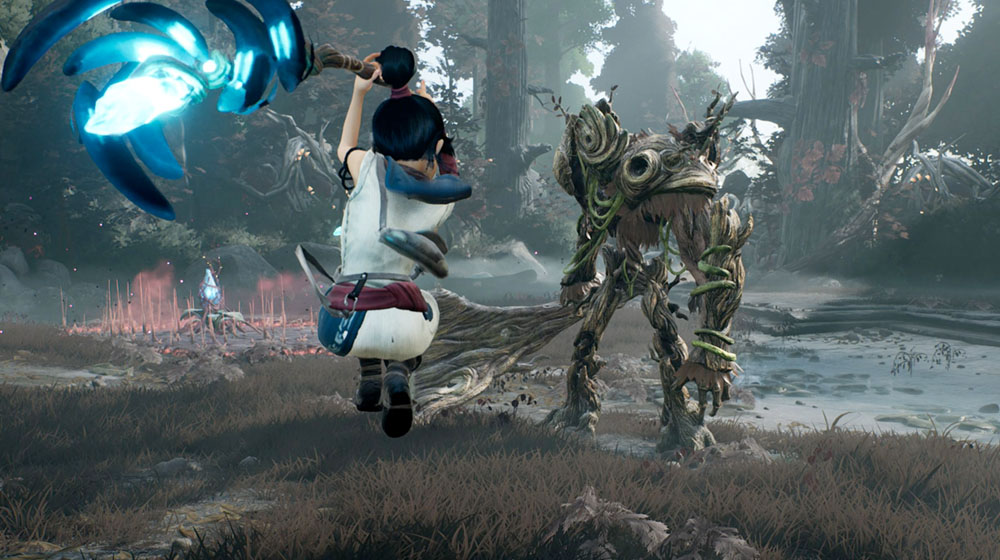
Wood Knight (pictured above)
This big dude looks a bit like an over-sized version of the Kappa boss, but it’s attacks are very different. For a starters, the Wood Knight is much less illusive, so don’t expect it to run away from Kena whatsoever. It’s also got a big whoop off staff that looks like it’s either made of some kind of monster keen bone or half a tree that it thrusts at you with a lot of damage.
Running and dodge rolling out of the way of this is your best bet and you can also use Kena’s back flip dodge and parry if you’re fighting it up close to avoid its swipe moves. The charge attack with the staff takes a lot of its health bar and you can combine this up with ranged bow attacks to chip it down to size.
To make the most out of this, keep an eye out for it’s glowing amber weak spots, which give you extra damage. Use the bullet-time bow move to give you more time to get in an accurate shot on them. You can also use the Rot bind move to give you a chance to get behind it to get any weak points on its back, which you can see at 06:20 in the gameplay video at the bottom of the page.
Sprout Captain
You find this dude when you crack all of the shrines in the Forbidden Forest. When it first appears, be ready to hit it with a few arrow shots to chip away at it’s health and then dodge fast to avoid it’s jumping attack. Aim for its week point with your bow to get in some big damage and keep rolling to reduce the amount of damage you take throughout the boss fight.
Use the Rot bind when you can to give you some good free hits and use bow to chip it down to size. If you’re low on health, you can find a flower inside the room it comes out of.
AdvertisementYou can also see it being defeated in the video above.
Mage
This guy appears after you head to Taro’s gate once you beat the Sprout Captain. The Mage fight is different from all of the other bosses, because it can summon magic orbs of red energy that explode on contact with Kena. They also track her and with the little minions that it can summon too, it can be tough to get in close to defeat it.
Circle around to avoid the orbs and to be able to get in close to the Mage to do a mini flurry of light hits, but be ready to roll out of the way if it fires another orb. Rot bind once you build up abilities and this will free you up to smash it a little too. The Rot hammer can also take away a lot of its health, and that should be enough for you to finish it off.
Shrine Guardian
The Shrine Guardian is a big bruiser of a boss, however, its got lots of weak points to aim for with the bow, which is a lot easier with the bullet time slow motion effect when you’re drawing. Beat up the little enemies to build up your Rot abilities and use your dodge roll anytime the Guardian jumps at you. Again, the Rot hammer mover will take away a lot of its health.
When you’ve done a third of damage it will send out roots and drop to the floor, run and roll to avoid these, get closer to it and send the Rot out to the bulb on its back. Hit it with an arrow and you’ll do even more damage to it and with all of that you should be able to beat it.
Corrupted Taro
Taro is one of Kena Bridge of Spirits’ main characters. He’s a trapped spirit that has become corrupted by the pain he experience in life. This is the big boss that appears at the end of the trailer and it’s a pretty tough challenge to beat it. It’s fast and agile, so you’re going to need to be light on your feet and be ready with the dodge roll to stay out of the way of its more dangerous moves.
It charges a little like a great ape and carries a huge sword, so it’s going to combine all of that speed with a lot of potential damage, so you’re going to need everything that Kena has got to finish it off. It can dodge arrow shots too, so the Rot to be a big part of how you take it down. However, the best bet is to aim arrow shots to hit it’s golden lamp pendant around its neck then you’ll be able to do some big damage and give you time to get in close for a few more hits.
AdvertisementBe ready to dodge or better still parry Corrupted Taro’s sword swings when its covering its eyes after the lamp smash. Use Rot bind and then immediately slow aim a bow shot at its blue glowing shoulder to bring it down for a long flurry of damage on it, but again, it will retaliate in the end, so be ready for it.
As you take away its health bar, it’ll do a desperate series of lunge swipes, which you can dodge like crazy to avoid. It culminates with it having its glowing sword stuck in the ground and this is your opportunity to break it with some staff hits.
When it goes into the final phase of the boss fight and starts running around Kena, aim for the lamp as it’s charging to bring it down for the finish with some Rot hammer action and normal combos. Check out the video above to see it all in action.
If you want to support us here at Tuppence Magazine, you can follow us on Twitter to see more on the latest video games releases.
Vine Knight
The Vine Knight will take you by surprise as you head off to clear the corruption at the Barn. You have a number of other enemies to fight off before it even appears, so it’s important to clear these without taking too much damage and building up your Rot abilities.
To start with, try to get bow shots in on its weak points and use the bomb energy to chip away at it. Use the bomb blasts as openings to take out the harder to reach weak points behind its shield and use the Rot hammer to do some big damage to it. You can also chip away its health using arrows to it’s exposed shoulder and legs, which will make it easier to do damage without being in range of its vine attacks. Roll to avoid any vine attacks close up and that should see you through to beat it.
Stone Guardian
By this stage, you can see that the Kena: Bridge of Spirits bosses have been taken to the next level. Not only are they all different in terms of their visuals, but they all require a unique strategy to beat them. The Stone Guardian is a great example of this.
AdvertisementYou’ll need to use the bomb to blow some of the stones out of the way to reveal its weak points to start with and get onto taking them down one by one. You can build up Rot Abilities with the weaker enemies that are a part of the Stone Guardian boss fight, just make sure you remember to dodge roll any time you hear the big dude coming for you.
You can sprint to the side to avoid its targeted boulder attack, which is one of its toughest moves. Use the health flower to top up if you get hit by one of these and when you’ve chipped away enough of its stone armor you can start to deal damage to it using the Rot Hammer. When it ducks down, sprint to avoid the attack and send out the Rot to the bud on it’s back to deal the finishing blow with an arrow shot to the blue orb.
Rot Eater
This sluggy chomper of a boss is one ugly sucker. However, it’s an easy one to beat with the Rot water in the middle. Send in the Rot to do a ground slam move on it and take out the moths with the bow and you should breeze through this fight.
Corrupt Woodsmith
If you thought Corrupt Taro was tough, the Woodsmith makes that fight look like a sparring session. The trick is to target the central Village Heart forge thing protecting it with the bomb move and firing three consecutive jumping arrow shots into it before it closes. This will give you a chance to deal damage to the boss. If you’re really struggling with the timing, you can see it in action in the video above.
Mask Maker
The key to this boss fight is to use Kena’s recently acquired teleport glide move, which will get you in close to the Mask Maker, allowing you to dish out the damage. You can use the same move to avoid its attacks too and to get through its energy blast.
Warrior
At this stage, bosses can seem tough, but the reality is that Warrior is pretty easy to defeat. Use the glide move a lot and mix it up with light combos to build up Rot abilities and use for the hammer move to deal big damage and disrupt its moves. Roll and dodge its attacks in different directions, or parry them if you’re good at the timing, and then use the glide move to get through its expanding energy field.
You can simply do a jump to avoid its grab move and that should make the rest of the fight a doddle, even if you’re playing it on expert difficulty.
Hunter
AdvertisementThis git is a tough one to land damage on to begin with, but when you realise that you can bring it down to the ground using a simple arrow shot to the face, it becomes a whole lot easier. Use the lock on to run after it and when the hunter boss stops, and finishes its initial attack, do a slow motion arrow move and try to get it in the face. This will bring it to the ground and you can do the slide dash move to get close and do some damage.
Dodge and use the trees to avoid its arrow shots to give you a window to fire in your own face shots and use the Rot hammer when its down on the ground to do some big damage. You can use the warp dash move to get through its energy field, similar to the previous Toshi’s bosses. Use your shield or parry when it does its dash attack move and you should be able to see out this fight fairly comfortably.
You can also see more on Kena: Bridge of Spirits with the official Ember Lab Twitter page at https://twitter.com/emberlab.
Kena Bridge of Spirits final bosses
Corrupt Toshi
This is the final corrupted villager that you’ll need to fight and it’s Toshi, the misguided leader. Start with the glide attack and light combo to get in some early damage before landing a Rot hammer, but be ready to jump and dodge out of the way when he starts to hit back. When he rises into the air, shoot him in the face using the slow motion arrow move and rush in with the glide attack to deal more damage, finishing with more Rot hammer.
You can jump it’s ground pound move to avoid the expanding energy blasts and then repeat everything above to defeat it, which will trigger the final boss fight. You can also see Corrupt Toshi getting himself beat in the video above to get some more tips.
Corrupt Rot God
Ember Lab has definitely saved the toughest of the Kena Bridge of Spirits bosses for last with the Corrupt Rot God. It’s the biggest and baddest in the game and you need to be on your toes throughout the fight to last to the end. To begin with you want to shoot it in the week spots as quickly as you can to get through the first phase. It’ll take a few arrows to each to trigger them and you’ll need your glide move to dodge out of the way of its attacks, particularly its claw swipe grab.
After the first phase of the boss fight, you’ll teleport to an area with a gate and a series of enemies to beat. This is where you need to be careful to take each of them out without getting hit. Jumping and doing slow motion arrow shots is a good method to reduce the chance of losing health during this phase, but you can see how its done in the video below.
When the Wood Knight is added into the mix, this is where you need to be most careful. Chip away at it as you finish off the rest of the enemies with the bow move and then throw in a few bomb to add to the damage until you finish it off.
This will then transition into the next phase with the Corrupt Rot God and you’ll need to do the same thing as in the first phase, which will then transition into a climbing section. Use the flowers with the bow at the top to make it and then you’ll be back for the last phase of the main boss fight.
In the third phase, you do damage by targeting the big spears piercing the back of the Rot God. You’ll need to send the Rot up to it to pull them out, so you can use the enemies that spawn to build up Rot abilities, while avoiding damage from the boss, to wait for the right moment to strike. Again, you can see this all for yourself in the video above and as soon as you pull the last of the spears out, you’ll beat the game. If you’re low on health then you can get some back with the Rot flowers around the arena.
AdvertisementAnd that’s all of the bosses that feature in the game. It was an absolute blast getting to fight them all, especially the end boss, which pushes you to the limits.
Don’t forget to check out our computer games section to keep tabs on the game, or visit Ember Lab website at https://www.emberlab.com/.
