

Our guide to The Legend of Zelda Tears of the Kingdom Construct Factory and depot bays shows you everything that you need to do to complete the confusing Depths section. You get to the Construct Factory close to the end of the game, but it’s incredibly easy to get stuck with no way to progress, so the guide should get you back on track.
If you still haven’t completed all four of the Regional Phenomena, but you stumble on the location then you should know that you can’t progress with the factory until later. Each of the Depots won’t work and the Construct Factory won’t activate, so you’ll need to take these on first.
AdvertisementWe’re not going to discuss the story elements in any detail, but in general you need to have carried the mask down from Dragonhead Island to the Construct Factory to be able to progress with this section of TotK. It’s here that you start to turn the tide on Ganadorf’s plan, and start the process of getting ready to take on the final boss fight, so it’s worth the effort.
The sticking point that makes The Construct Factory and its Depots so tough is that if you don’t connect the dots in the first instance then you’re pretty much soft-locked. The Caretaker Construct halfway up the ruins doesn’t help with his chat about parts from the depots with no mention of what you’re actually supposed to do.
There are four parts that you need and they each correlate to a section of the body on the large construct in the center of the square at the factory. You get here after uncovering the light beam from Dragonhead Island and while the voice says you must come to me quickly it doesn’t tell you what your next steps should be.
You can follow us on Twitter to see more on the latest video games releases, and you can see more on The Legend of Zelda Tears of the Kingdom with the official Nintendo Twitter page at https://twitter.com/NintendoAmerica.
RELATED:
Get OP fast in The Legend of Zelda Tears of the Kingdom
Advertisement
How to start the Construct Factory guide
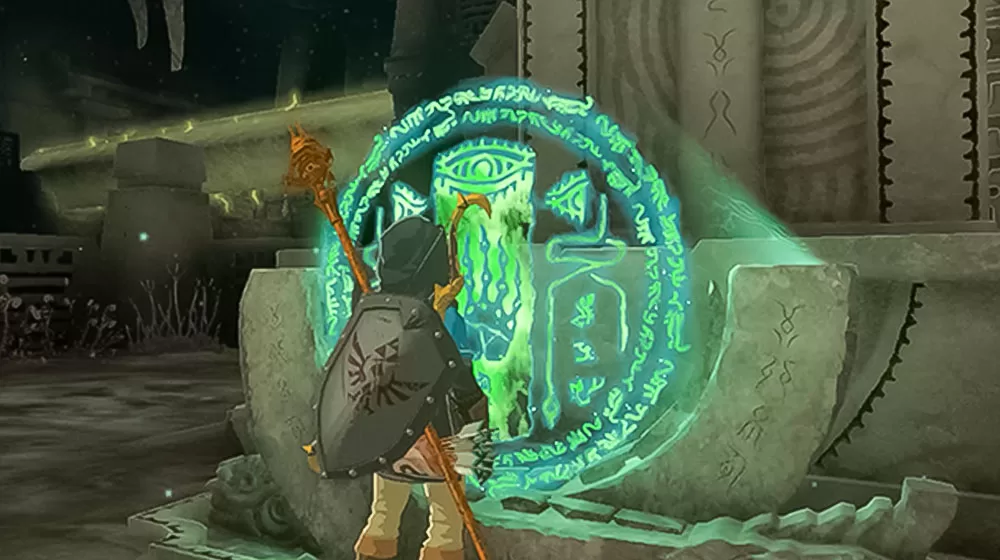
This is pretty much the key to progressing with this section of TotK, because if you don’t start things off right at the Construct Factory then you’ll stumble on the Depots and find that they don’t work at all. Literally! There’s nothing that you can do.
To fix this, you need to start things off by carrying the mask down to the body and using Ultrahand to put it in place as the head of the giant construct. As soon as you do that things go very differently when you get to the Depots.
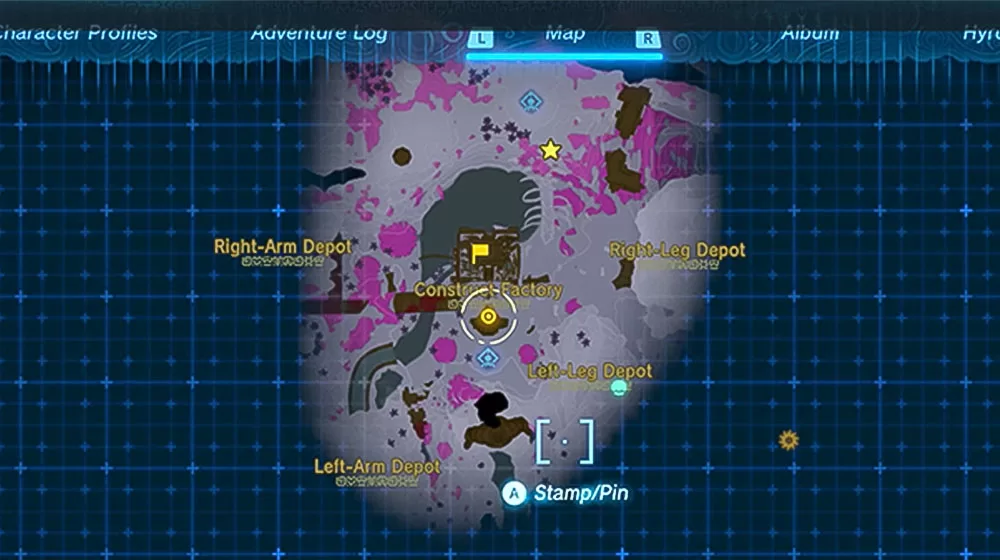
However, they can also trip you up with some tough puzzles to solve, so you can read the guide for each of these below. If you’re not too sure where to find the Depots, you can see their locations on the map below to give you a few pointers in the right direction.
RELATED:
The Legend of Zelda Tears of the Kingdom Bosses
If you want to see it all play out in full, you can watch the walkthrough below for both the Factory and all four of the Depots, as well as the head setup. This will see you completing the Construct and heading out on the next part of The Legend of Zelda Tears of the Kingdom.
What to do at the Left Leg Depot
With the Factory activated, you can now go to get the parts for the rest of the Construct, so head south east from the Factory to get to the Left Leg Depot. Activate the switch and you’ll get a block containing the parts, but the first door will close and the second will open, so you need to carry it through.
There’s a puzzle to solve along the way, though, but using your abilities will help to make easy work of it. Lift it up as high as you can using Ultrahand or with a rocket, and use Ascend to get up to the ledge above.
AdvertisementYou can now use Recall on the parts block and be ready with Ultrahand to grab it when it comes back up from its previous fall. You can see this in action in the walkthrough video above for all of the Depots. Carry the block to the factory and drop it at the feet of the construct to get the left leg, which you can now put in place.
Right leg Depot
You can find the Right Leg depot up the hill to the north east of the Factory, as you can see on the map, but you’ll need to use the glider to get over to it. If you’re not too sure how to get there you can see where you’re aiming for in the video from the 7-minute mark.
RELATED:
Get More Battery in The Legend of Zelda Tears of the Kingdom
Once you’ve triggered the switch, you start by using the rocket lift to get the parts up to the next level. Attach it to the bottom of the rile rung and use the rotate function of Ultrahand to jostle it up and over the rail blocks.
If you’re having difficulty with this process, you can see it in the video at 10:02. Keep going until you get it close to the ledge above and then let it fall. Use Ascend to get up there and then use the Recall and Ultrahand grab trick that we talk through for what to do at the Left Leg Depot.
You then use the fan lift to take it to the next level up, detaching it from the rail rung, and build a fan wing to fly it down to the factory. If you attach the parts to the bottom it right in the middle it should have good balance to fly easily and then put the leg into the construct to complete this one.
RELATED:
Get Rupees Fast in The Legend of Zelda Tears of the Kingdom
Left Arm Depot
The Legend of Zelda Tears of the Kingdom really knows how to test you, but you’re getting close to the prize with the Left Arm depot, just up the hill to the south west of the Factory. Trigger the switch and take the parts through the door by activating the wheel mechanism.
Use Ultrahand to put it as far into the lava and then climb over to the other side to get it out and repeat the process with the next lava corridor. However, make sure you do the same with the wheel, which you’ll need on the other side to make the same door mechanism as before to get out.
AdvertisementThe parts will then float down the stream to the Factory, so you just need to follow them down. Put the left arm in place and that’s another done.
Right Arm Depot
Retrace your steps to the Left Arm Depot and head north west to get to the Right Arm. Start it off with the switch and carry the parts up the ramp to the electrified bridge. Build it into a car using the wheels and let that ride across to the other side. We’re still working on where to find the rubber armor set, but this method works very well and we’re pretty sure it’s what the developers wanted you to do anyway.
Use the glider to get across, turn off the wheels and pick the whole thing up using Ultrahand to carry it outside. You can then ride it down the hill using the nearby control panel, which you can add to the build, smashing through the Boss Bokoblin hoard along the way.
RELATED:
The Legend of Zelda Tears of the Kingdom best armor sets
Detach the parts at the factory and use the Right Arm to finish the build of your very own armored construct ride to get all Gundam on The Legend of Zelda Tears of the Kingdom. That will see you completing the Construct Factory and the Depots and you’ll be able to ride the robot to your next location.
This will lead to a boss fight with the Seized Construct, so you might want to read our guide to defeat it with the link. With that done you’ll need to start getting ready for the final boss fight, so our how to get the Master Sword page will also come in handy.
More things to find around the Construct Factory
The Construct Factory is also the home of one of the Depths’ best kept secrets, a Bargainer Statue. There’s a few of them under Hyrule and they can be used to exchange Poes for certain legendary items. They also give you the Depths armor set and the one close to the factory gives you the Tunic of the Depths, which comes with Gloom resistance.
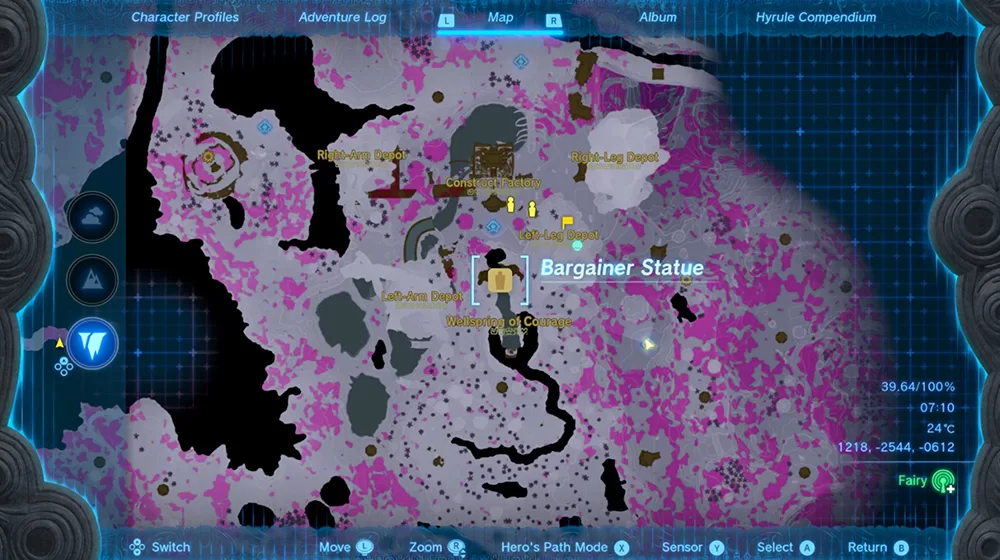
To find the Bargainer Statue, head south from the place you land close to the Construct Factory from Tobios Hollow Chasm. Head past the Muokoij Lightroot and circle around the rock wall that blocks the way south (see map image location below).
RELATED:
What will be the next Zelda game?
When you get around to the other side, you should get a notification that you’ve found the Statue, but it’s easy to not know where it is even with this. Climb up the other side of the rock wall and you should see a dark statue similar to the one you can exchange Poes for at Lookout Landing. Pray and pay and you’ll be on your way.
You can also find a Stalnox up to the north of the Construct Factory and a trio of weapon specters, which offers a pristine weapon drop. You can find them both to the west of the Uisihcoj Lightroot.
Check out our computer games section for more news and features on Tears of the Kingdom, or visit The Legend of Zelda website at https://www.zelda.com/.
