

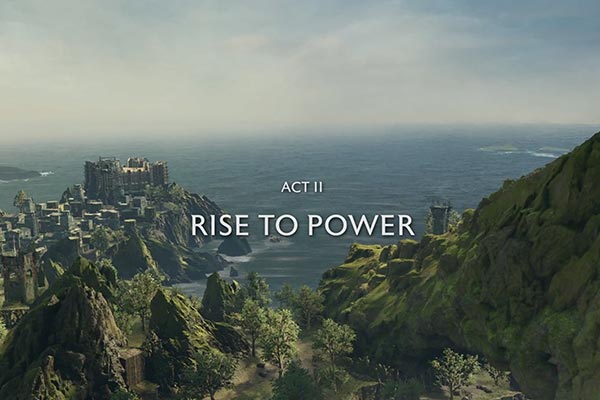
 If you’ve managed to escape from the Witch-king’s clutches in Minis Ithil, then you will have progressed onto Middle Earth: Shadow Of War Act 2, which sees you transported to Nurnen to build your army. It makes for a big transition in the game as you go from the more rigid setup of the first Act and progress to the beginnings of the open world adventure.
Our walkthrough and videos should help you overcome some of the tougher challenges that the second act has to throw at you, including Nazgul, War Chiefs and the violent nature of Carnan. The game itself is pretty ferocious and there are some epic quests to complete, along with the missions to build up enough forces to strike back at Sauron, who now controls Minis Ithil.
Middle Earth: Shadow Of War Act 2 walkthrough & gameplay videos:
Dominate 10 archers
This is essentially the start of Act 2, but it continues on from The Fall quest, which you will have started at the end of Act 1. You’ll get a new skill to dominate Uruks with B and you’ll need to stealth up to 10 archers to claim them for your war effort. However, if you get discovered then you’ll need to start all over again, so it’s a tricky one. You’ll need to go into advanced sneak stealth mode to get all 10 archers, making sure you always approach them from behind, so you don’t get rumbled. Check out our video above to see what route we took.
Ring of Power Quest
Now that you’ve got a small band of archers at your back, the next step in the journey to war is to dominate your first Captain and the Ring of Power Quest sees you facing Bruz The Chopper in the arena melee of The Pit. You’ll have a few Uruks around as well, to add in a little more mayhem to the quest, but in general they come in handy to drain and dominate with B when you need them. Bruz fights like a War Troll, so just duck under his legs and hit him up with your attacks. When he’s broken you’ll be able to dominate him with B and recruit him to your ranks. Holding B for Captains takes longer than for Uruks, so you’ll need enough space to finish it off and complete the quest.
The Witch-king’s Vision Quest
Eltariel has discovered a plan by the Witch-king to hunt you down using the power of the Haedir and the Palantir. You’ll need to hunt down five worms to interrogate them to get more details on the plan. They’re all pretty straightforward to sneak up on, but the last one has a small retinue following it, so try to get behind them all and systematically dominate each until you get to the worm to complete the quest.
Violent Nature Quest
This is one of the toughest and most intense quests in Middle Earth: Shadow Of War so far and its very cool to play through and eventually meet Carnan. You’ll start off heading into the Forest of Carnan and you’ll need to find Uruks trapped by Carnan in tree roots to interrogate them to find out more about the eerie powers in the woods. They’re not easy to find though and the location markers only show up when you get close, so you’ll need to keep trekking into the forest to find them. The first is straight ahead, the second is up to the left on a ridge near a couple of Caragors and the last in in the middle of the main basin, but look out for the diamond markers as you approach.
When you’ve interrogated the final Uruk, Carnan’s tree will appear and you’ll eventually go on to face three different forms of Carnan. The first is a might Caragors, which is fairly easy to beat with arrows at its head. However, the second iteration is an Elemental Graug, which is very powerful and hurls waves of fire and flaming rocks at you. Keep running away from it and use A to roll out of the way of the rocks. When it roars, fire an arrow into its mouth and you’ll be able to run in to do some damage. Repeat to take it out. The final incarnation is Drake, but it’s a little easier to finish off. Keep hitting it in the head with arrows and run away if it gets too close and you should be fine.
Unlock The Etten Quest
The only remaining Quest on the map by this point is The Etten, but it’s locked. To unlock it, you’ll need to recruit more Captains, so head out in search of them to add them to your troops. When you get close to the skull marker you’ll need to investigate the clue, which will send you to the nearest barracks to search for the Captain in wraith view, which you can see us doing a few times in the walkthrough video above.
The Three Towers Quest
This quest is also locked, but you’ll unlock it when you cleanse all of the Haedirs, so head off to do that first and then you’ll be able to start The Three Towers Quest and see it on the map. You’ll need to get to each of the three Haedir towers before the timer and while the first is a simple, straight run that you should do comfortably, the second two are more challenging, so you can follow our walkthrough video above to see the quickest routes to take. When you get to each of the three towers, you’ll need to take out the Captain and his team to stop them from taking back the Haedir.
The first two are relatively easy enough if you remember to dominate drain the Uruks every now and again, but the final Captain will have a Nazgul helping it. Here, the best tactic we found was to take out the Orcs with dominate, block and ignore the Nazgul and finish off the captain by leaping over him and attacking until he breaks. Once he’s finished off you’ll need to defeat the Nazgul using Y to block its attacks, A to dodge its sword swipes and X to bring it down to breaking point when you can hold B to dominate it and scare it away, the same as you did in The Fall Quest.
Infiltration Missions and Raids
If you want your force to be at its most powerful ahead of The Etten Quest, which we’ll be taking on next, you’ll need to take on a few Infiltration Missions and Raids. The first will see you commanding one of your captains that you recruited when unlocking The Etten Quest. Go to the Army menu, hover over your chosen captain and command him to infiltrate a War Chief. Then you’ll need to go to the map to set a waypoint for the mission and head over to watch your Captain proving himself in The Pits. If he wins then he will be assigned to the enemy War Chief ready to doublecross him when you attack the fortress.
Raids, however, will simply take out an enemy Captain if successful, reducing their numbers when you attack a fortress. Again, command a chosen Captain to Raid an enemy and head over to the start point to help them in the task of taking out the enemy Captain. There are examples of both in the walkthrough video above.
The Etten
Now that you’ve unlocked the Quest by building up your forces, set up a spy with an infiltration mission and taken out a number of enemy Captains then you should be ready to fight it out for control of Nurnen by taking the fortress. Bruz will start it off by talking you through the Siege upgrades, which are well worth putting in place ahead of the battle. Once you’ve done that, assigned a bodyguard and put a Captain as one of your attack commanders, you’ll be ready for the challenge ahead.
Our preferred approach is to dominate all of the archers on the front walls of the fortress and then head over to Victory Points A on the left to help Bruz take it. When it has been captured you can press ahead to Victory Point B, but make sure you dominate Uruks as you go to keep your health high and if Bruz starts to bleed out you can regenerate him by holding B. Next take Victory Point B and head to the main fortress building to complete the quest and take Nurnen.
Conquest and The Fight Pits Quest
There are just two more short Quests to complete to finish off Nurnen and open up the regional map. The first is Conquest, which is essentially just an intro to the online Conquest missions where you try to take on other peoples’ fortresses to gain rewards, and the Siege missions, which are the opposite where your defenses will need to be strong enough to fend off online attacks. As a result, it’s work going to the Siege Upgrades menu from the Army screen to start bolstering your fortress.
The second quest is an introduction to The Fight Pits by Bruz, where you can set your own Captains against an enemy fighter. Win and your Captain gets a rank boost. Lose and you lose your Captain to death in the pits. However, that will give you a new, powerful Captain to go after and recruit in the winner. You can’t really do all that much in The Fight Pits, but it’s all about preparation and choice of Captain. Look at your opponents details and select a follower that could exploit their weaknesses to come out victorious. Win all three in each location and you’ll unlock the citidel upgrade, which can help strengthen your fortress.
Allies Quest
This will be the first quest in Act 2 set in Seragost, and the big challenge to start with is getting all the way over to it. If you just keep running and follow our path in the video, then you should be fine. Once you get there, you’ll get a cinematic with Baranor before teaming up with him to free Gondorian soldiers. Just dominate everyone that gets in your way and you should find it pretty easy to let them out.
This continues into the cave network, and it’s a similar story. Although there is a Captain to face. Domination is the key and with Baranor’s help you should be able to defeat anyone and everyone to free all of the Gondorians and complete the Allies Quest.
Blood Sport
This time, you’ll have both Baranor and Idril in your camp, but you’ll start out meeting Baranor in the Seragost Fight Pits. You’ll have a Caragors to take out before a couple of Ologs join the battle and Idril appears for the first time since the end of The Fall Quest. It all comes to a head with a Captain to take out, but he shouldn’t really be all that much of a match for you by this stage.
The Uninvited Quest
Continuing the Shadow Of War action with Idril in Seragost, this quest will see you on a grog tampering mission to fight back against the savage victors of the Battle for Minis Ithil. Start out in stealth mode to poison the grob barrels without being detected. It’s tough with so many thirsty Uruks around, but you can try heading further up the map to where it’s quieter. Next, you’ll have a battle with the local Captain, so try to dominate as many of his troops to get them on your side before focusing on him with the help of Idril. If you’ve got the frost vault set, it’ll freeze him every time you jump over him, freeing you up to get in the hits. He’s a slippery customer, so you need him to stay still for long enough to finish him off.
The Wages Of War
This time you’ll be helping Baranor out with more Gondorian soldier rescues. This starts out being a pretty easy case of taking out Uruks and cutting the soldiers free, but when you’ve let the last of them go, Baranor is taken prisoner by one Seragost captain, and then a second appears to ambush Talion before he can intervene.
That will leave you with both captains and a lot of Uruks to fight. Start by taking out the Uruks with Quiver of Souls skill activated, which will give you arrows for each drain you successfully complete. Stay out of the way of the two dangerous captains as you go. When you’ve got a good batch, head up out of the way to the top of the walls and get in as many head shots on the flame captain, Stakuga. That should see the other captain climbing up to face you, isolating him and giving you an easy route to finishing him off. Then its just a case of shooting Stakuga until he falls to comples The Wages Of War quest.
Check out our The Wages Of War Shadow Of War walkthrough video to see how we finished the two of them off.
You can see all of our latest Middle Earth: Shadow Of War walkthrough videos for both Act 1 and Act 2 on our YouTube Channel playlist.
