

 With the recent arrival of The Champions Ballad DLC to The Legend Of Zelda: Breath Of The Wild, Nintendo Switch gamers got a huge new adventure to take on back in Hyrule. The biggest challenge in the second DLC pack for the game is the series of shrines, battles and puzzles you’ll need to swathe through to pick up the Master Cycle Zero and these start with the series in the Great Plateau, where you’ll need to clear four locations of enemies with the One-Hit Obliterator, before taking on a shrine in each of the locations.
How the One-Hit Obliterator works
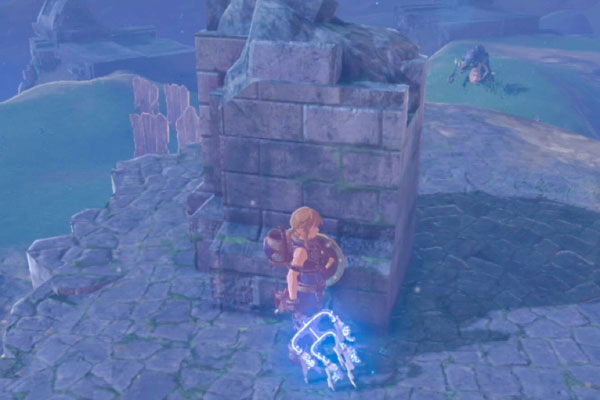
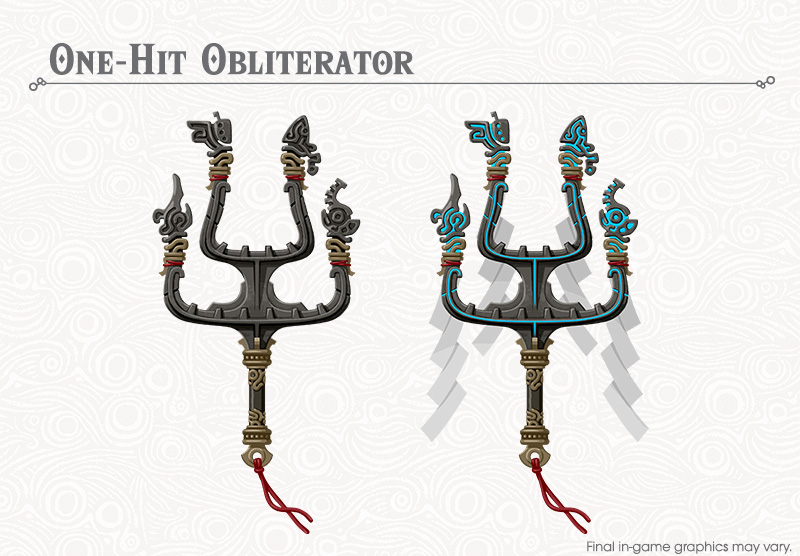 Essentially, the One-Hit Obliterator is a legendary weapon that will take out any enemy in the game with a single hit. However, it comes with a few limitation to make things a little more complicated when you face each of the four enemy patrolled locations and the shrines that they unlock.
Firstly, it can only be used twice on the bounce before it charges down and stops obliterating enemies for a short period. When it’s charged back up again, it’ll flash with blue light and you’ll have the benefit of its instant justice once again. This makes you vulnerable to attacks from other enemies in the vicinity when it charges down, so it’s advisable to try to take on enemies in ones and twos.
This is because the second proviso of the One-Hit Obliterator means that when you wield it, you’ll be in game over as soon as you take a single hit. It drains your hearts to the very last one as soon as you pick it up, so it’s a precarious balance between ultimate power and complete fragility.
How to start The Champion’s Ballad DLC
You’ll only be able to start The Champions Ballad DLC adventure to get the Master Cycle Zero Of you’ve already unlocked each of the four Divine Beasts. If not then you’ll need to get back to the main story of the game until you do and the next step is to take your Sheikah Slate back to the Shrine Of Resurrection in the Great Plateau.
Once there, you’ll be given the One-Hit Obliterator, with all of its benefits and limitations, before being told to use it to clear enemies at each of the four locations marked on the map. This will then lead to a shrine trial to appear in each of the four locations, which is the first part of the overall DLC challenge.
Forest of Spirits One-Hit Onliterator enemies
For us, this is the second most difficult area to clear as you have enemies on various levels and there are plenty of them than can sneak in an end game hit. We tackled this section by paragliding in and dealing with the Bokoblin archer on the long hollow tree stump first, before jumping over and on up to get the second Bokoblin archer at the top of the big tree stump.
The colony of Kees flying around will then attack you either after the first or second Bokoblin, so be ready to swipe them with the One-Hit Obliterator for all you’re worth to get rid of them, whether it’s charged up or not. This should clear them out and leave you free to use a few remotes to deal with the other Bokoblin at the base of the stump.
Then you can jump on down to mop up the rest. If you get a few enemies after you at the same time, make sure you run in and out to clear them when the One-Hit Obliterator is at max charge. You might need to do a quick sweep of the area to get the last enemy in the Forest Of Spirits, but when they’re all done, the Yowaka Ita Shrine will appear.
Yowaka Ita Shrine
This Shrine is all about patience and skill. When you arrive, simply head down the ball run, staying out of the way of any of the rolling game overs that fly around you. This is all about timing and using the ledges for protection, so wait for a break in the cycle and run down to the larger ledge on the right hand side.
When you get down to the bottom, you then use the Magnesis Rune to pic up the bowl to catch the ball keys and chests that come flying down the run out on the left. Check out the video to see how we did it, but it takes a fair bit of determination to get your first pickup. It gets a little easier the more items you take out.
The flying chest gives you some bomb arrows, which will come in handy, but the one behind the door that you unlock with the large ball key is just a weak bow. You can then pickup the small ball key and walk it up to the top using the ledges for shelter for safety I Between waves to put it in place and complete the Yowaka Ita Shrine.
Eastern Abbey One-Hit Onliterator enemies
This is probably the most challenging area to clear with so much open space and Lizanthos at the ready with their horns to fall in everyone to get you at once. As with all of our efforts with the One-Hit Obliterator trials, high ground is the starting point, so circle around to the right and come at them from above. Try to take one out at a time and retreat to the safety of the top of the skull in the dip beside the Eastern Abbey.
If you repeat this, you should be able to take all of the Lizanthos out on the top two levels. Paraglider Obliterations can work well when you’ve got the numbers down to a reasonable level and then you can dash in to get the stationary Guardian before finishing off the last of the Lizanthos further down the ridge to reveal the Rhota Chigah Shrine.
Rohta Chigah Shrine
This is an epic Shrine with a good level of difficulty and multiple areas of doom to clear. You start out by using Magnesis to move the metal slates and block around the spike floor to get the chest and then over to the other side. Take your time and position everything as close as possible to minimise the potential of any game overs.
This will lead you through to the next section, where you’ll need to use Stasis on the second cog to make it up to the top. From here, track the movement of the top cog staying away from the danger of the edge and the spikes while you wait for the Stasis Rune to charge back up again. When it’s free to use, fire it at the first conveyor belt and run up to get onto it. Head on through the middle of the spike run to the other side, compensating slightly for the remaining conveyor belts with the directional buttons (this should be very subtle though as big movements will get you too close to the spikes).
The final section is to paraglide past three swinging maces. If you’ve got any arrows, you can shoot down the first ball, and then freeze the second with Stasis to make it a little easier. If, like us, you don’t, just freeze the second and try to get your timing and movement right to make it to the bottom and complete the Rohta Chigah Shrine. Don’t hit the walls though, as this will interrupt your paraglider and deal you a game over.
One-Hit Obliterator enemies near the Temple Of Time
After you complete the Rhota Chigah Shrine, head up to the Temple Of Time and look over the ledge to the south to see the enemies in the wooded area below. Use remote bombs from here to take out as many of them as possible, but they will climbs up to you, so be ready to get them as they come up with the One-Hit Obliterator. You can use the wall of the Temple Of Time as an ambush point whenever you see them storming up the hill.
Use your bomb arrows tactically to help you finish off some of the bigger enemies, like the Moblin, or if the Bokoblin rider charges up at you like it did for us. The Fire Lizanthos are tough to deal with when they charge up to the top, so be ready to circle them as fast as possible to avoid their flame breath and they take them out with the OHO.
Once most of the enemies near the Temple Of Time are dealt with, you’ll need to paraglider down to take out the archer Fire Lizanthos on the two rocks and mop up any remaining Bokoblins to finish the area and unlock the Ruvo Korbah Shrine.
Ruvo Korbah Shrine
This is a genius shrine that starts out looking like a very easy test of strength against a Guardian Scout with the One-Hit Obliterator, but turns into a series of tests on the way to complete Ruvo Korbah. The Guardian Scout is dispatched without breaking a sweat with your shield up to block its opening barrage and a quick hit with the OHO. Pick up it’s shield and head to the other side of the room. This then leads up to a chest and a switch, which sends you paragliding down into the pits of the Shrine.
Keep your shield up as you move on from the bottom and work your way around to the small key chest, taking out the Guardian Scouts as you go. This will then open the door and lead into the final section of the Ruvo Korbah Shrine, where you’ll find four Guardian Scouts ready to fire at you.
Use the Guardian Shield to fire back the lasers at them, but it’ll only take out the one at the back. The others are too powerful, so you’re going to need to use the One-Hit Obliterator to finish them off. Put up ice blocks as barriers for the one ahead and the one to the left and then paraglide over to the left to get in a hit. You can then walk around to the other two to finish them off and glide over to the end of the Shrine.
Mount Hylia One-Hit Obliterstor enemies
You’ll find all of the enemies at the foot of the final assent up to Mount Hylia, but you’re better off scaling the peak just ahead of it to gain high ground on them. From here you can pick the majority of them off with Remote Bombs and bomb arrows, but make sure you start out by dealing with the Ice Wizzrobe with a bomb arrow to take it out of the equation.
You’ll also need to hit any of the Ice Kees that fly up to you with the One-Hit Obliterator pretty quickly, but after that you’ll be safe to rain down the pain on the enemies below. Once you’ve slowly cleared them all at the base of the peak that you’re on, you can paraglide over to the side of Mount Hylia and do the same from that angle to get the Moblins. Once they’re done, use bomb arrows on any Ice Chuchus and then glide down to mop any of the remaining enemies and unlock the Estu Korima Shrine.
Etsu Korima Shrine
This is as dark and seemingly dangerous as Shrines get in The Legend Of Zelda: Breath Of The Wild with lasers, spikes and Guardian Scouts to deal with, along with a very well hidden chest. However, it looks a lot more sinister than it actually is.
You’ll start out with laser beams to duck under and a final moving one to get past, which are easy to navigate. Next you’ll find yourself in a room with slowly rotating spike boards, which don’t really pose much threat of you keep your distance and move slowly. Head left and you’ll be able to get a chest up on a ledge, which you can get down by either lighting the vines dangling down from it or shooting a bomb arrow at it to get a gold rupee.
Next up you’ll have a few simple Guardian Scout to smash up with the One-Hit Obliterator. Keep your Guardian Shield up and you should be fine against them. When they’re done, you’ll finish the Etsu Korima Shrine, the last of the four One-Hit Obliterator trials in the Great Plateau.
What happens when you complete the One-Hit Obliterator Shrines?
(SPOILERS)
Once you finish the four trials, the One-Hit Obliterator will split into four and scatter to different locations around Hyrule. You’ll then need to track each down and trigger more trials in each location, which gives you 12 more challenges and Shrines to complete in the bid to unlock the Master Cycle Zero.
