

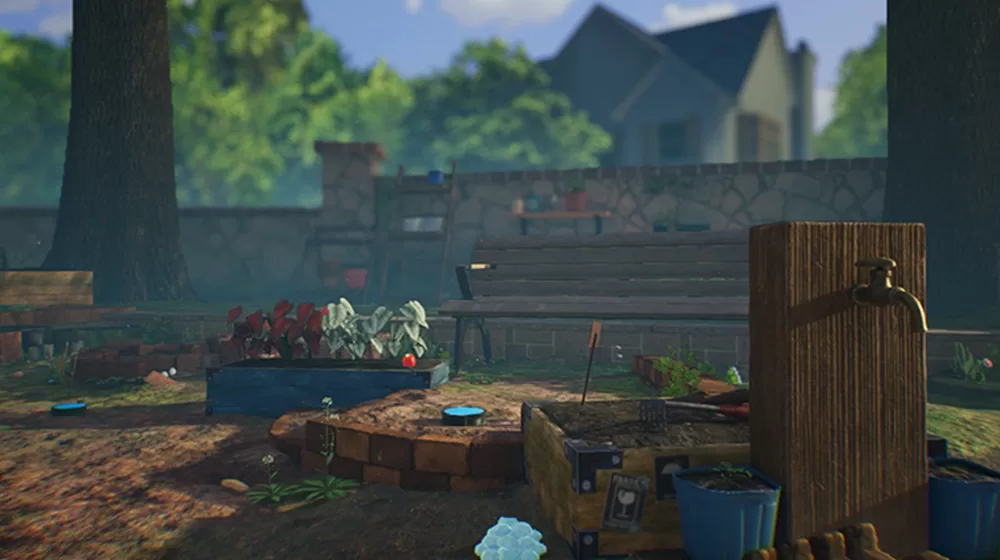
Our Pikmin 4 Sun-Dappled Terrace walkthrough guide will take you through all of the rescues and onions that you can find and their location. It’s a big area with some challenging aspects, so the walkthrough should help you get through it quicker and spend less time trying to get the Blue Pikmin onion.
As you progress in Sun-Dappled Terrace you’ll unlock a few cool abilities like Oatchi’s swim and Pikmin carry moves. However, you should also take advantage of the advancements back at the base as these will help you as you explore.
AdvertisementThere’s a lot of treasure to find in the area, but this is the easiest collection. The real challenge is with finding more people to rescue, collecting all of the onions and unlocking the growth capabilities of flarliks, so this will be the focus of the walkthrough.
Don’t forget to follow us on Twitter to see more on the latest video games releases, and you can see more on Pikmin 4 with the official Nintendo Twitter page at twitter.com/nintendoamerica.
Sun-Dappled Terrace flarliks walkthrough
In the first part of our Sun-Dappled Terrrace walkthrough we’ll be covering where to find all of the flarliks. There are two of them in the area and each one will give you ten more in your take-out squad in Pikmin 4.
This is instrumental in getting all of the onions in the location, but it also means you’ll just have more Pikmin to help you pick up all of the treasure along the way. When you start out in Sun-Dappled Terrace, you’ll be facing a 5 and 1 flower with the crystal material to the right.
AdvertisementCollect the material and then head past it to a wall. If you use Oatchi’s tracking abilities it will lead you in the right direction. Break down the wall with you Pikmin and on the other side you’ll have an underground area called Last-Frost Cavern to explore.
Smash the pots with Oatchi’s Rush move, defeat the Fiery Blowhog with the red Pikmin and then continue to an area with a paper bag to push on the left. Once you’ve used the Pikmin to push it down, head over to the right and you’ll find what looks like an onion behind some more pots.
RELATED:
Pikmin 4 bosses
However, it’s the first of the flarliks, so get your team to carry it back and this will upgrade the onion to unlock ten more Pikmin to take out in Sun-Dappled Terrace. You’ll also find Ice Pikmin in Last-Frost Cavern and you’re going to need these to get one of the onions later on, so keep them safe.
You’ll need to use them to freeze and smash the Hydro Jelly to continue on and this will see you through to find the next member of Rescue Corps, scientist Russ. Get him back and you can continue up to the surface, but make sure you get all of the crystal material, which you’ll need for building later on.
AdvertisementOut top you’ll find another Fiery Blowhog, defeat it with red Pikmin and then you can setup a new base in the middle. You can then find the second flarlik in the north of the map (see image below), so you just need to knock down the walls and pull out the earth covered leaves to get through to it.
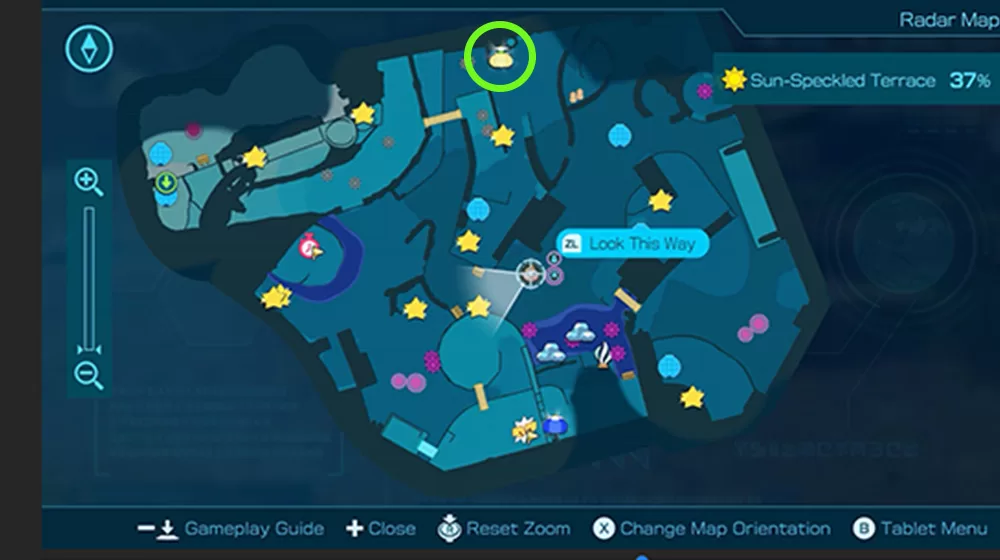
Clear out any enemies that are in the way that might stop your Pikmin from getting the flarlik back to the onion. Once they make it you’ll be able to take out 40 helpers for the rest of the Sun-Dappled Terrace walkthrough, which will make everything a lot easier. You can see the route to the second flarlick in the video at the bottom of the page at 2:01:24.
Sun-Dappled Terrace onions walkthrough
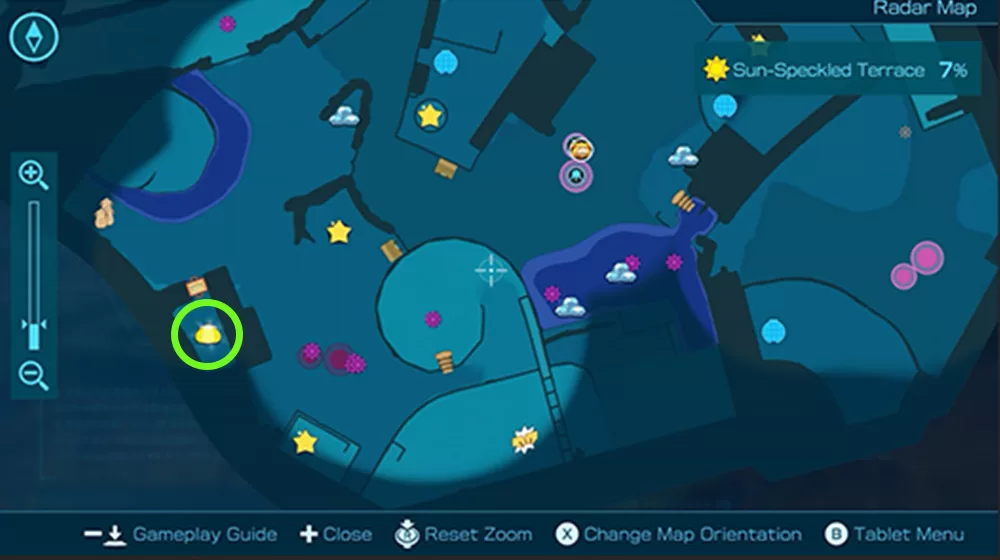
As with the flarlicks part of the walkthrough, there are two onions to find in Pikmin 4’s Sun-Dappled Terrace. The first of these is the easiest, as it’s the Yellow Onion, which is behind a paper bag in the south west of the map, which you can see in the map image below.
RELATED:
Pikmin 4 walkthrough
However, the Blue Pikmin onion is bit more challenging. It’s located across the large body of water to the south of the base and to get across this you’ll need to use 30 Ice Pikmin to freeze it.
AdvertisementIf you haven’t got enough of these, you can find lots of them underground. There’s a good batch in Aquiferous Summit in the north west, Last-Frost Cavern in the north east and Hectic Hollows in the south east. You can see where they all are in the video below if you need map references.
With the water frozen, you can get across to build the climbing wall with Oatchi and your remaining ten Pikmin and get up to the level above. Defeat the Fiery Blowhog and then you can see the Blue onion buried in the ground.
By this stage you’ll be able to dig it up with your Pikmin, but you’ll need Oatchi with his Buff upgrade at maximum to carry it back to the main onion base. If you don’t have this already, you need to speak to Captain Shepherd at the end of the day and exchange Oachi’s Pup Drive tokens for the upgrade.
RELATED:
The Legend of Zelda Tears of the Kingdom best recipes
You get more of these when you rescue more Corps members and civilians stranded on the planet. You can see where to find all of these in Sun-Dappled Terrace in the final part of the walkthrough below.
Sun-Dappled Terrace rescues walkthrough
AdvertisementAs mentioned in the first part of our Pikmin 4 Sun-Dappled Terrace walkthrough, you get the very first rescue, Mission Scientist Russ, down the Last-Frost Cavern. The second rescue is also underground down the Crackling Cauldron, which is located under a mound of earth behind the plastic binoculars and electric wall.
You’ll pick up Yellow Pikmin down here, which you can use to get through the electric wall in the Cauldron after you beat the Fiery Blowhog. This will lead to another drop to Level 2 and it’s down here that you find Treasure Appraiser Schnauz to rescue. You can see all of Crackling Cauldron in the video at the bottom of the walkthrough at 23:56 if you get stuck anywhere.
Anytime you see the raw material crystals, collect them to be able to build bridges and climbing walls. There’s a lot of it in Sun-Dappled Terrace, so you shouldn’t have any difficulty getting enough to make it to any of the areas mentioned in the walkthrough.
Once you’ve built the bridge to the north of the main base in the area you’ll come face to face with an unusual individual that has the body of an explorer but a face covered in leaves. He’s run off with another stranded person similarly transformed and you can rescue him by winning the Dandori challenge in the Trial Run.
RELATED:
The Legend of Zelda Tears of the Kingdom dragon farming
Advertisement
It’s relatively easy if you focus on getting as much treasure back as possible. If you need any pointers you can see a comprehensive win the the video walkthrough at the bottom of the page at 1:17:47.
The fourth rescue is down Hectic Hollow, which you can get to by crossing the bridge to the south east of the base in Sun-Dappled Terrace. You find it in level 2 again and you can see it in the video at 1:39:42. This will give you Florest Kingsley.
The fifth rescue is another leafy character and you can find him on the island surrounded by a moat of water to the west of the base. Freeze the water with Ice Pikmin and then you can get over to do another Dandori challenge to claim the individual for your tally. Again, just focus on the treasure and you’ll breeze through, but you can see Dandori Day Care in full at 1:50:48 in the video walkthrough further down.
With the bridge built to the north of the base you can now get up to Aquiferous Summit underground location in the north west of the map. Here’s where you’ll find the sixth rescue and you can see the area in full in the video at 2:03:58.
AdvertisementGetting down to level 2 is relatively easy, but you’ll need to navigate to the button to bring down the first of the gates to make it through to where the person is. However, it’s easy to miss. Look for the jelly next to the exit and smash it to reveal the rescue, which will give you Dingo the Ranger, part of the Corps.
Finally, you can find a seventh rescue in Sun-Dappled Terrace’s Industrial Maze underground area. You can find the entrance to the east of the main base next to the strawberry, but you can pick up the walkthrough in the video below at 2:34:59.
In the Maze you need to walk up the first conveyor belt before changing to Oatchi using Y and choosing to switch to him by pulling back on the left control stick. You can then use him to press the red switch then change back and move on over the second conveyor belt to be reunited.
You can then knock down the wall to get to level 2. Use the flying ledge to get over to the other side to trigger the switch and retrace your steps to get through the bars that have now been removed. Don’t just leave using the exit, though.
AdvertisementInstead, use Yellow Pikmin to break the electric wall, smash the pots with Rush and rescue the survivor up on the floating platform. That will give you Animal Enthusiast Dalmo to complete our walkthrough for all rescues, onions and flarliks in Pikmin 4’s Sun-Dappled Terrace.
Video walkthrough
You can see the whole of the video walkthrough for Sun-Dappled Terrace above, but it’s a hefty 3 hours plus. The timestamps in the rest of the walkthrough details higher up the page will help you navigate this, but if you just want to see it all you can go from start to finish.
We’ll update you with more details on Pikmin 4 as they’re confirmed. You can also check out our computer games section to keep tabs on other releases. Visit the Nintendo website at www.nintendo.com/ for more details.
